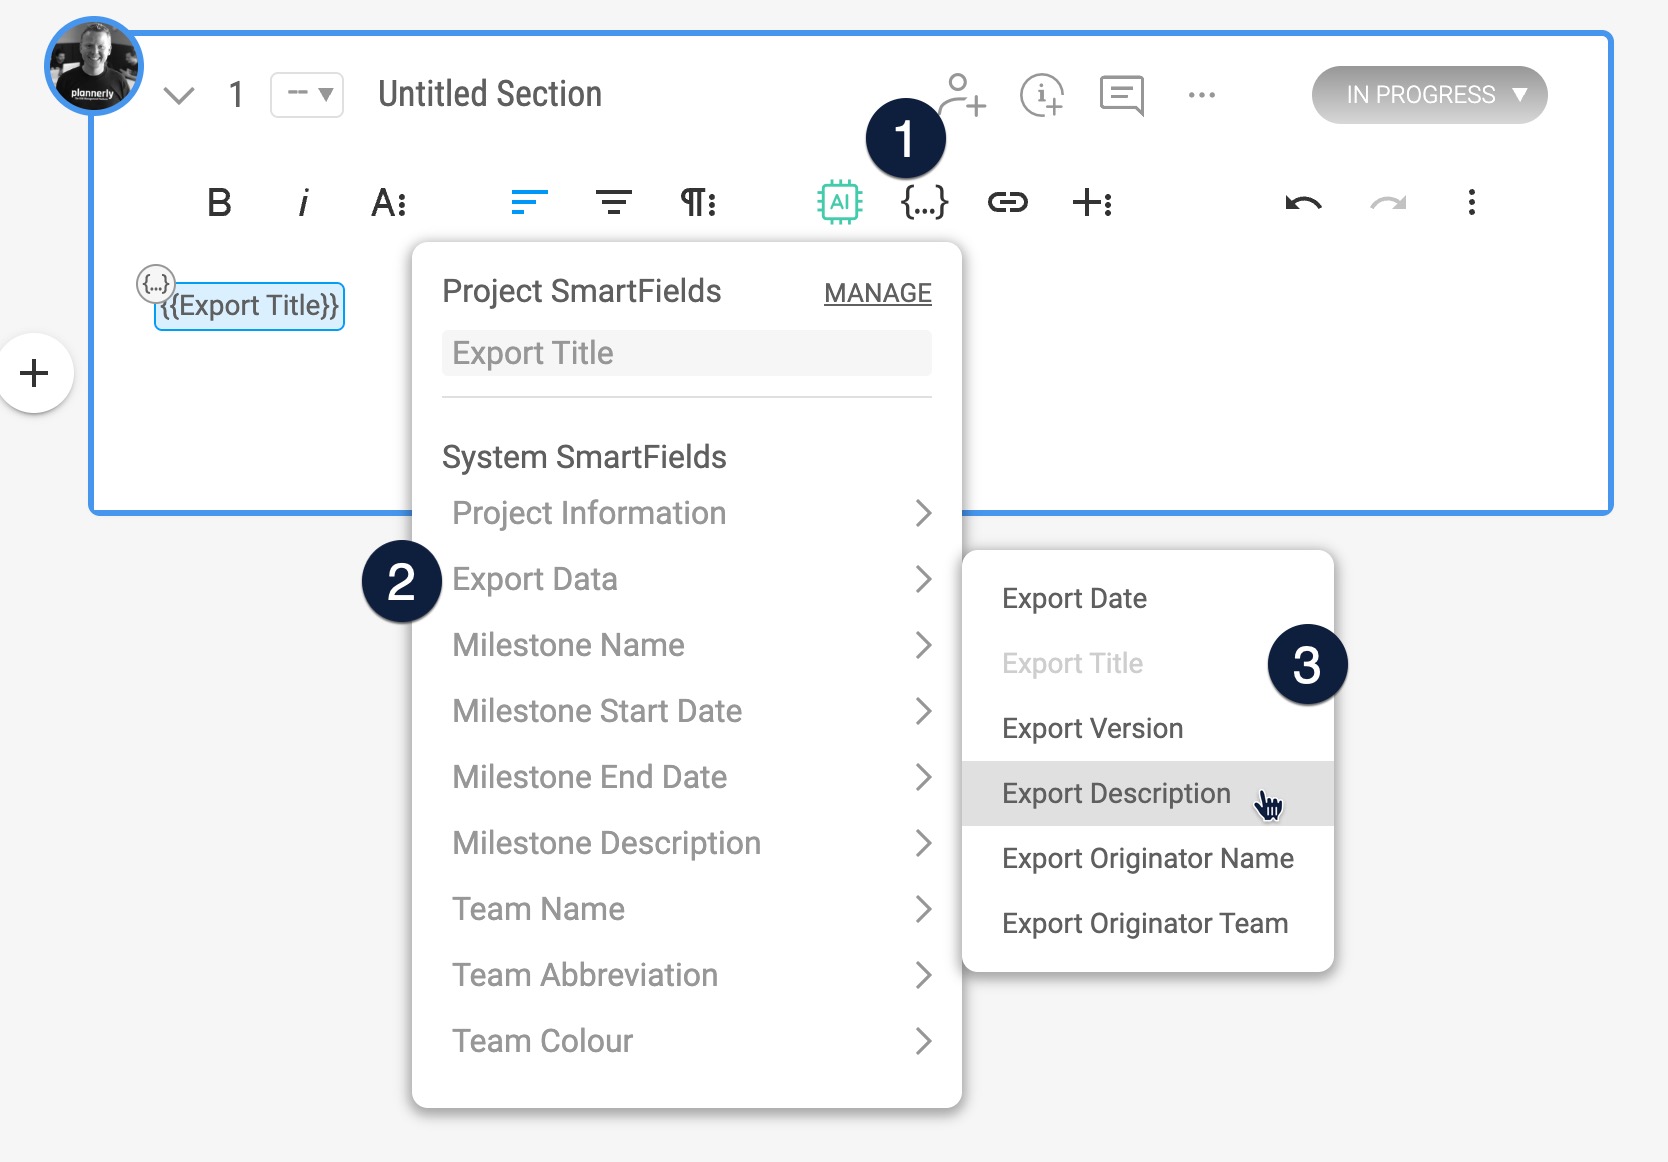
How to Insert a SmartField That Links to a Document Name
Use SmartFields to automatically pull your document’s Export Title and Export Description into any page. This is ideal for cover pages, headers, and footers.
Quick Summary
- Where to click: SmartFields icon in the editor toolbar.
- What to open: System SmartFields → Export Data.
- What to insert: {{Export Title}} or {{Export Description}}.
- Where values come from: The File Manager fields for document title and description.
Step-by-Step Instructions
- Open the SmartFields menu. In the document editor, click the SmartFields icon in the toolbar.
- Choose the category. In the panel, scroll to System SmartFields.
- Select your field. Under Export Data, choose either:
- {{Export Title}}
- {{Export Description}}
- Done. These SmartFields stay in sync. If you rename the document, the text updates everywhere on export.
Where the Export Title and Description Come From
When creating a document in File Manager, enter the document title and description. These values populate the SmartFields you insert anywhere in your document.
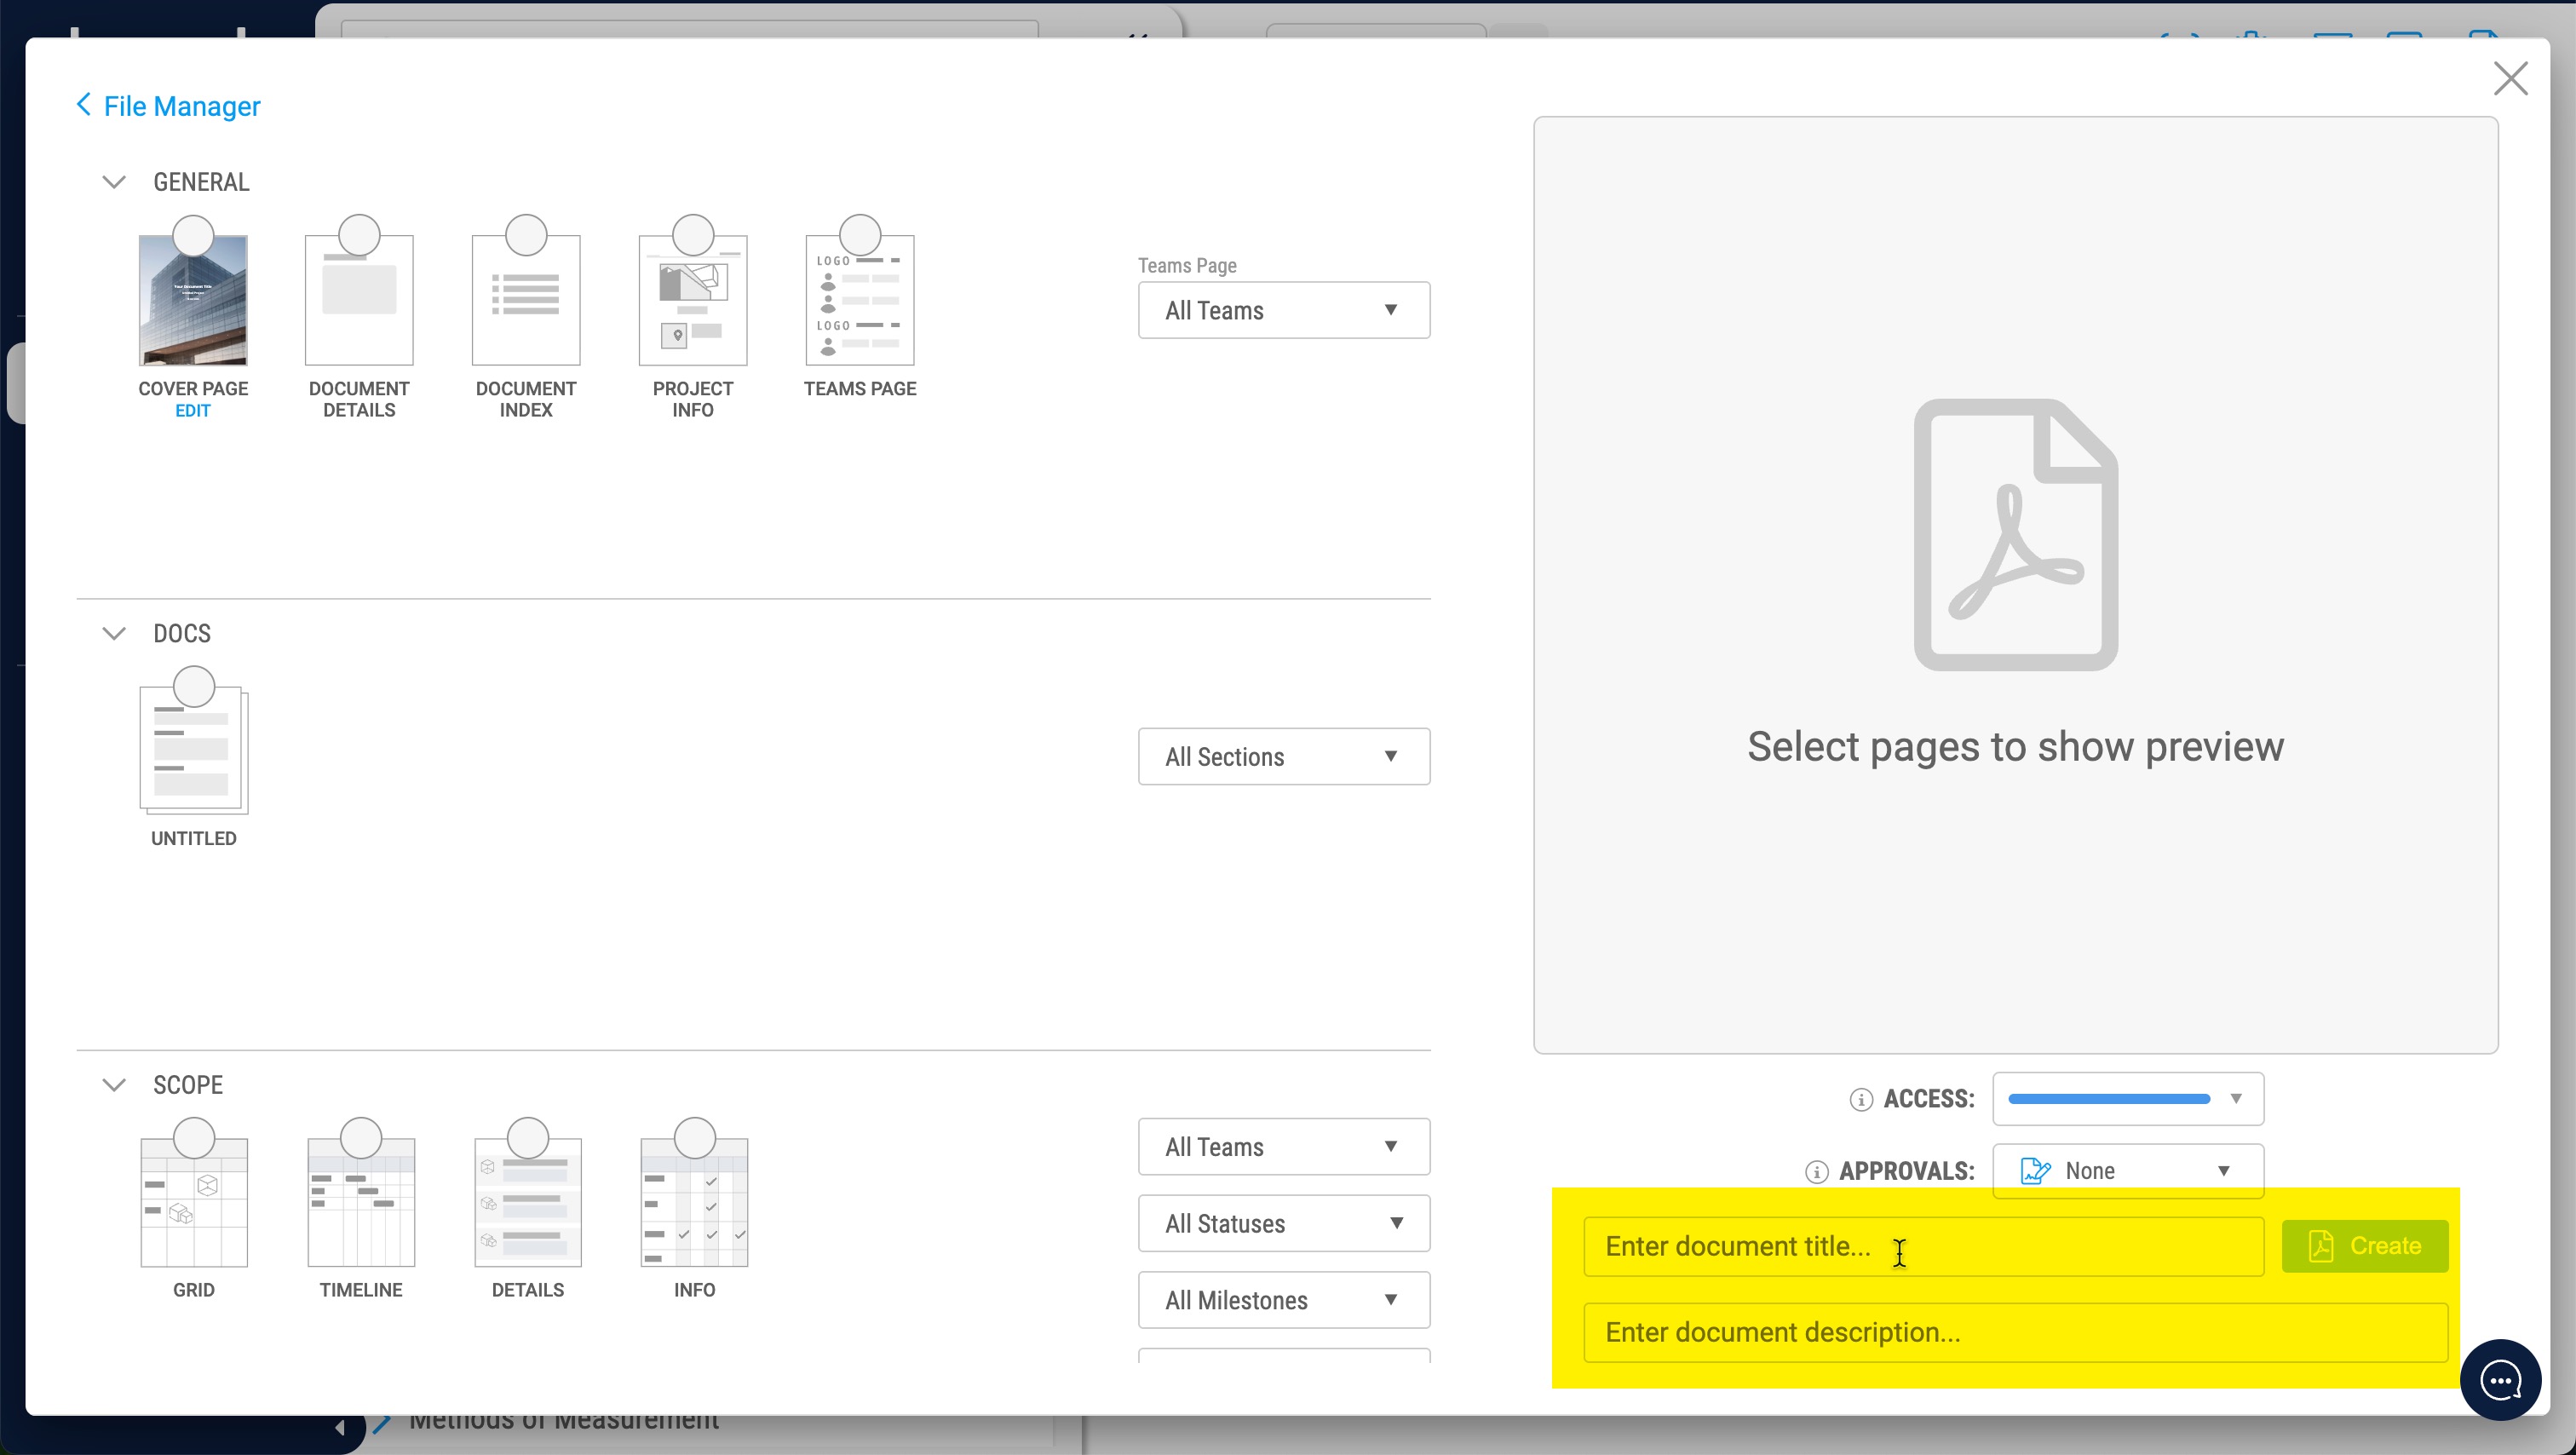
Tip
You can update the title or description at any time. Your SmartFields will reflect the latest values the next time you export the document.
Example Q and A
Q: Is there a way to insert a SmartField that links to a document name in Plannerly?
A: Yes. Insert the {{Export Title}} SmartField from System SmartFields → Export Data. You can also insert {{Export Description}}. Both fields pull their values from the document settings in File Manager.