1. Switch the Section to Landscape Mode
If your table is wide, switching the page orientation for that specific section can immediately give you more space.
How to Change Page Orientation
-
Click the three-dot menu on the section.
-
Select Change Portrait / Landscape.
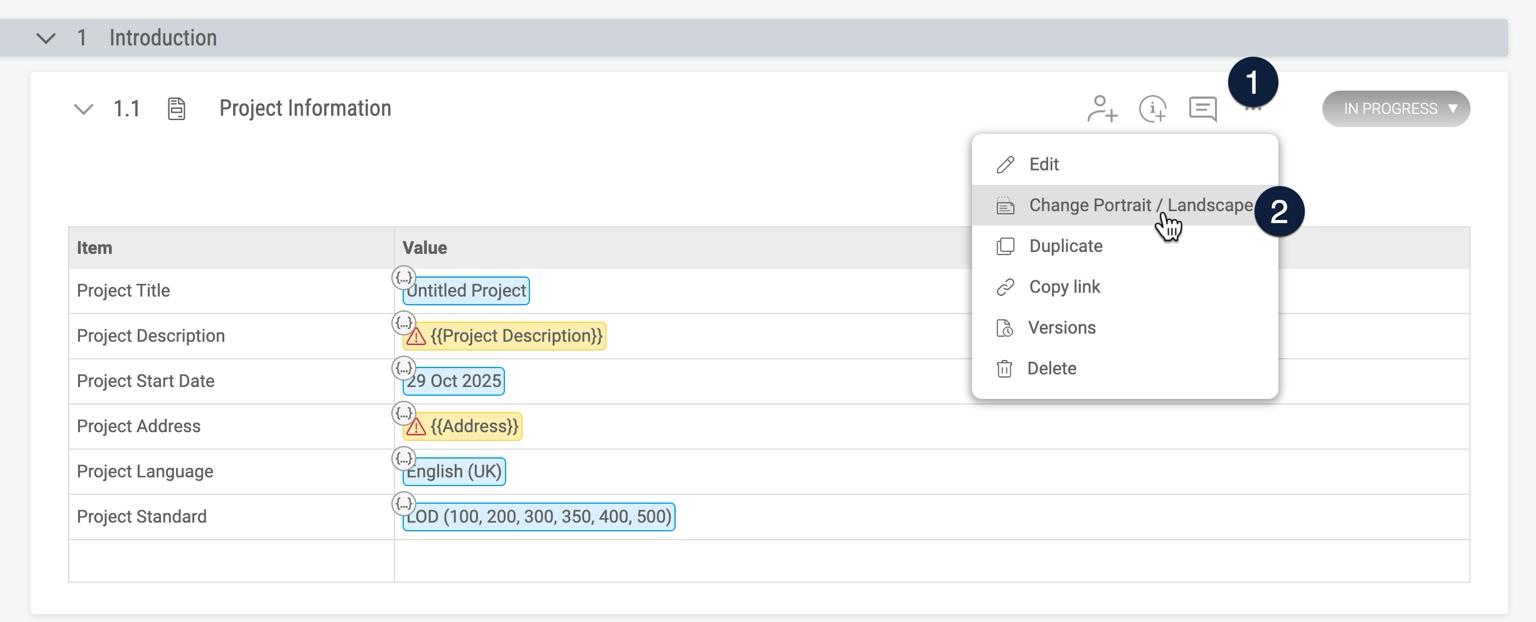
Important: Orientation applies only to the section you change - not the entire document.
2. Use Document View to See the Actual Page Orientation
After switching to portrait or landscape, you may want to confirm which orientation the section is now using.
How to View the Page Layout
-
Click the Document View button in the top toolbar.
-
You’ll now see the real page boundaries, including orientation, exactly as they will export.
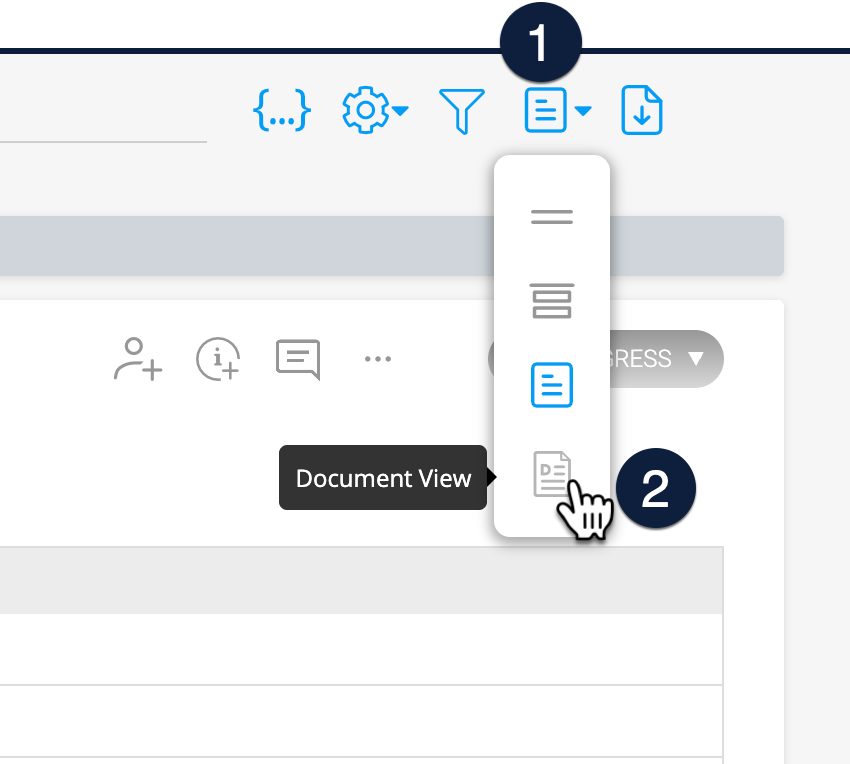
This makes it much easier to judge whether your table fits.
3. Reduce Table Width or Font Size (If Needed)
If landscape mode still isn’t enough:
-
Narrow column widths.
-
Shorten long text inside cells.
-
Reduce the font size in the section.
These small tweaks can prevent overflow when exporting.
4. Clear Formatting (If the Table Layout Looks Off)
Sometimes hidden styles from pasted content make tables behave unpredictably.
To clear formatting:
-
Highlight the affected table or text.
-
Click the More Text menu.
-
Choose Clear Formatting.
This resets everything to clean Plannerly styling.
5. Preview Before You Export
Always use Document View to check the layout.
This ensures the exported Word or PDF file looks exactly the way you expect.
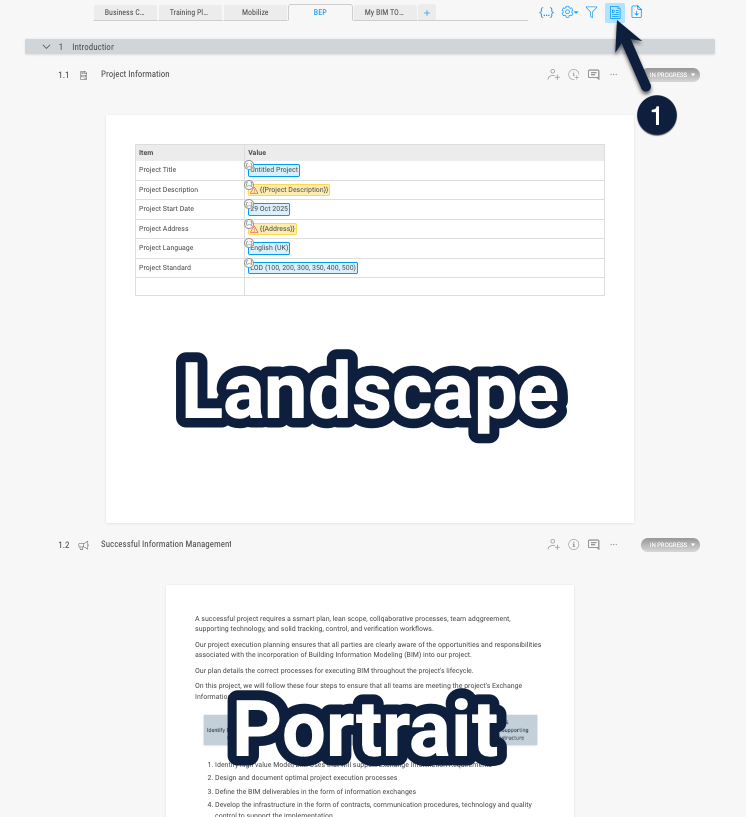
Example: Table in Landscape Mode
Below is what a landscape-oriented section looks like inside Document View:
Summary
If your tables are overflowing the page during export, try:
-
Switching the section to Landscape
-
Using Document View to confirm orientation
-
Adjusting table width and font size
-
Clearing formatting if needed
These simple steps will keep your exported documents clean, readable, and neatly formatted.