TL;DR
Reliable cost estimates depend on reliable models. This guide walks through five steps that connect structured requirements, automated model verification, and an AI-generated estimating dashboard through the Plannerly API. Pick an element, define how it should be modelled and measured, write verification rules, check the model against an IDS specification, then let AI turn the verified data into quantities, costs, risk sliders, and earned value in one place.
Watch: a step-by-step walkthrough from defining a wall element's methods of measurement to generating a live AI dashboard via the Plannerly API.
Step 1 - Pick the element and define methods of measurement
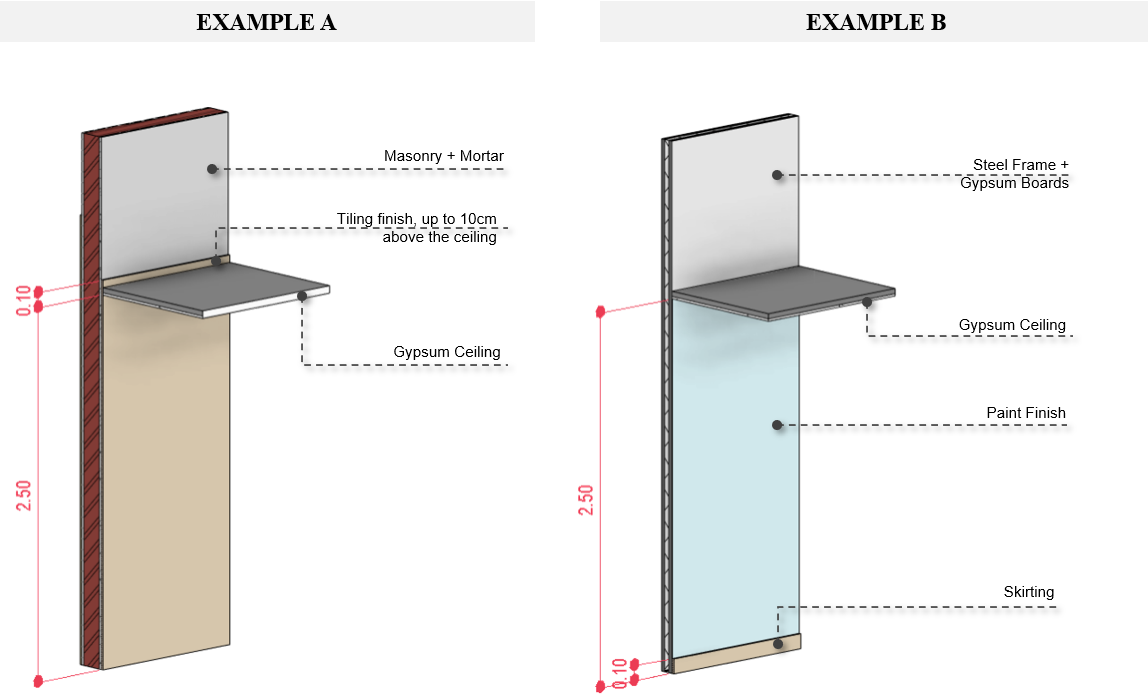
"I need quantities for the walls" is not something a modeller can act on, and not something an estimator can trust. Start by picking one specific element - an interior wall, a duct fitting, a ceiling, a skirting - and write down exactly how it should be modelled. Do you need openings, surface area, length for skirting, finishes, internal vs external? These choices drive everything downstream.
Create a new project in Plannerly and open the Docs module. On the left, pick the Methods of measurement template that fits your element - in this example, walls, floors and ceilings - and save it to your project. It now lives in the project alongside the requirements and travels with the contract pack later.
Step 2 - Add requirements and verification rules in Scope
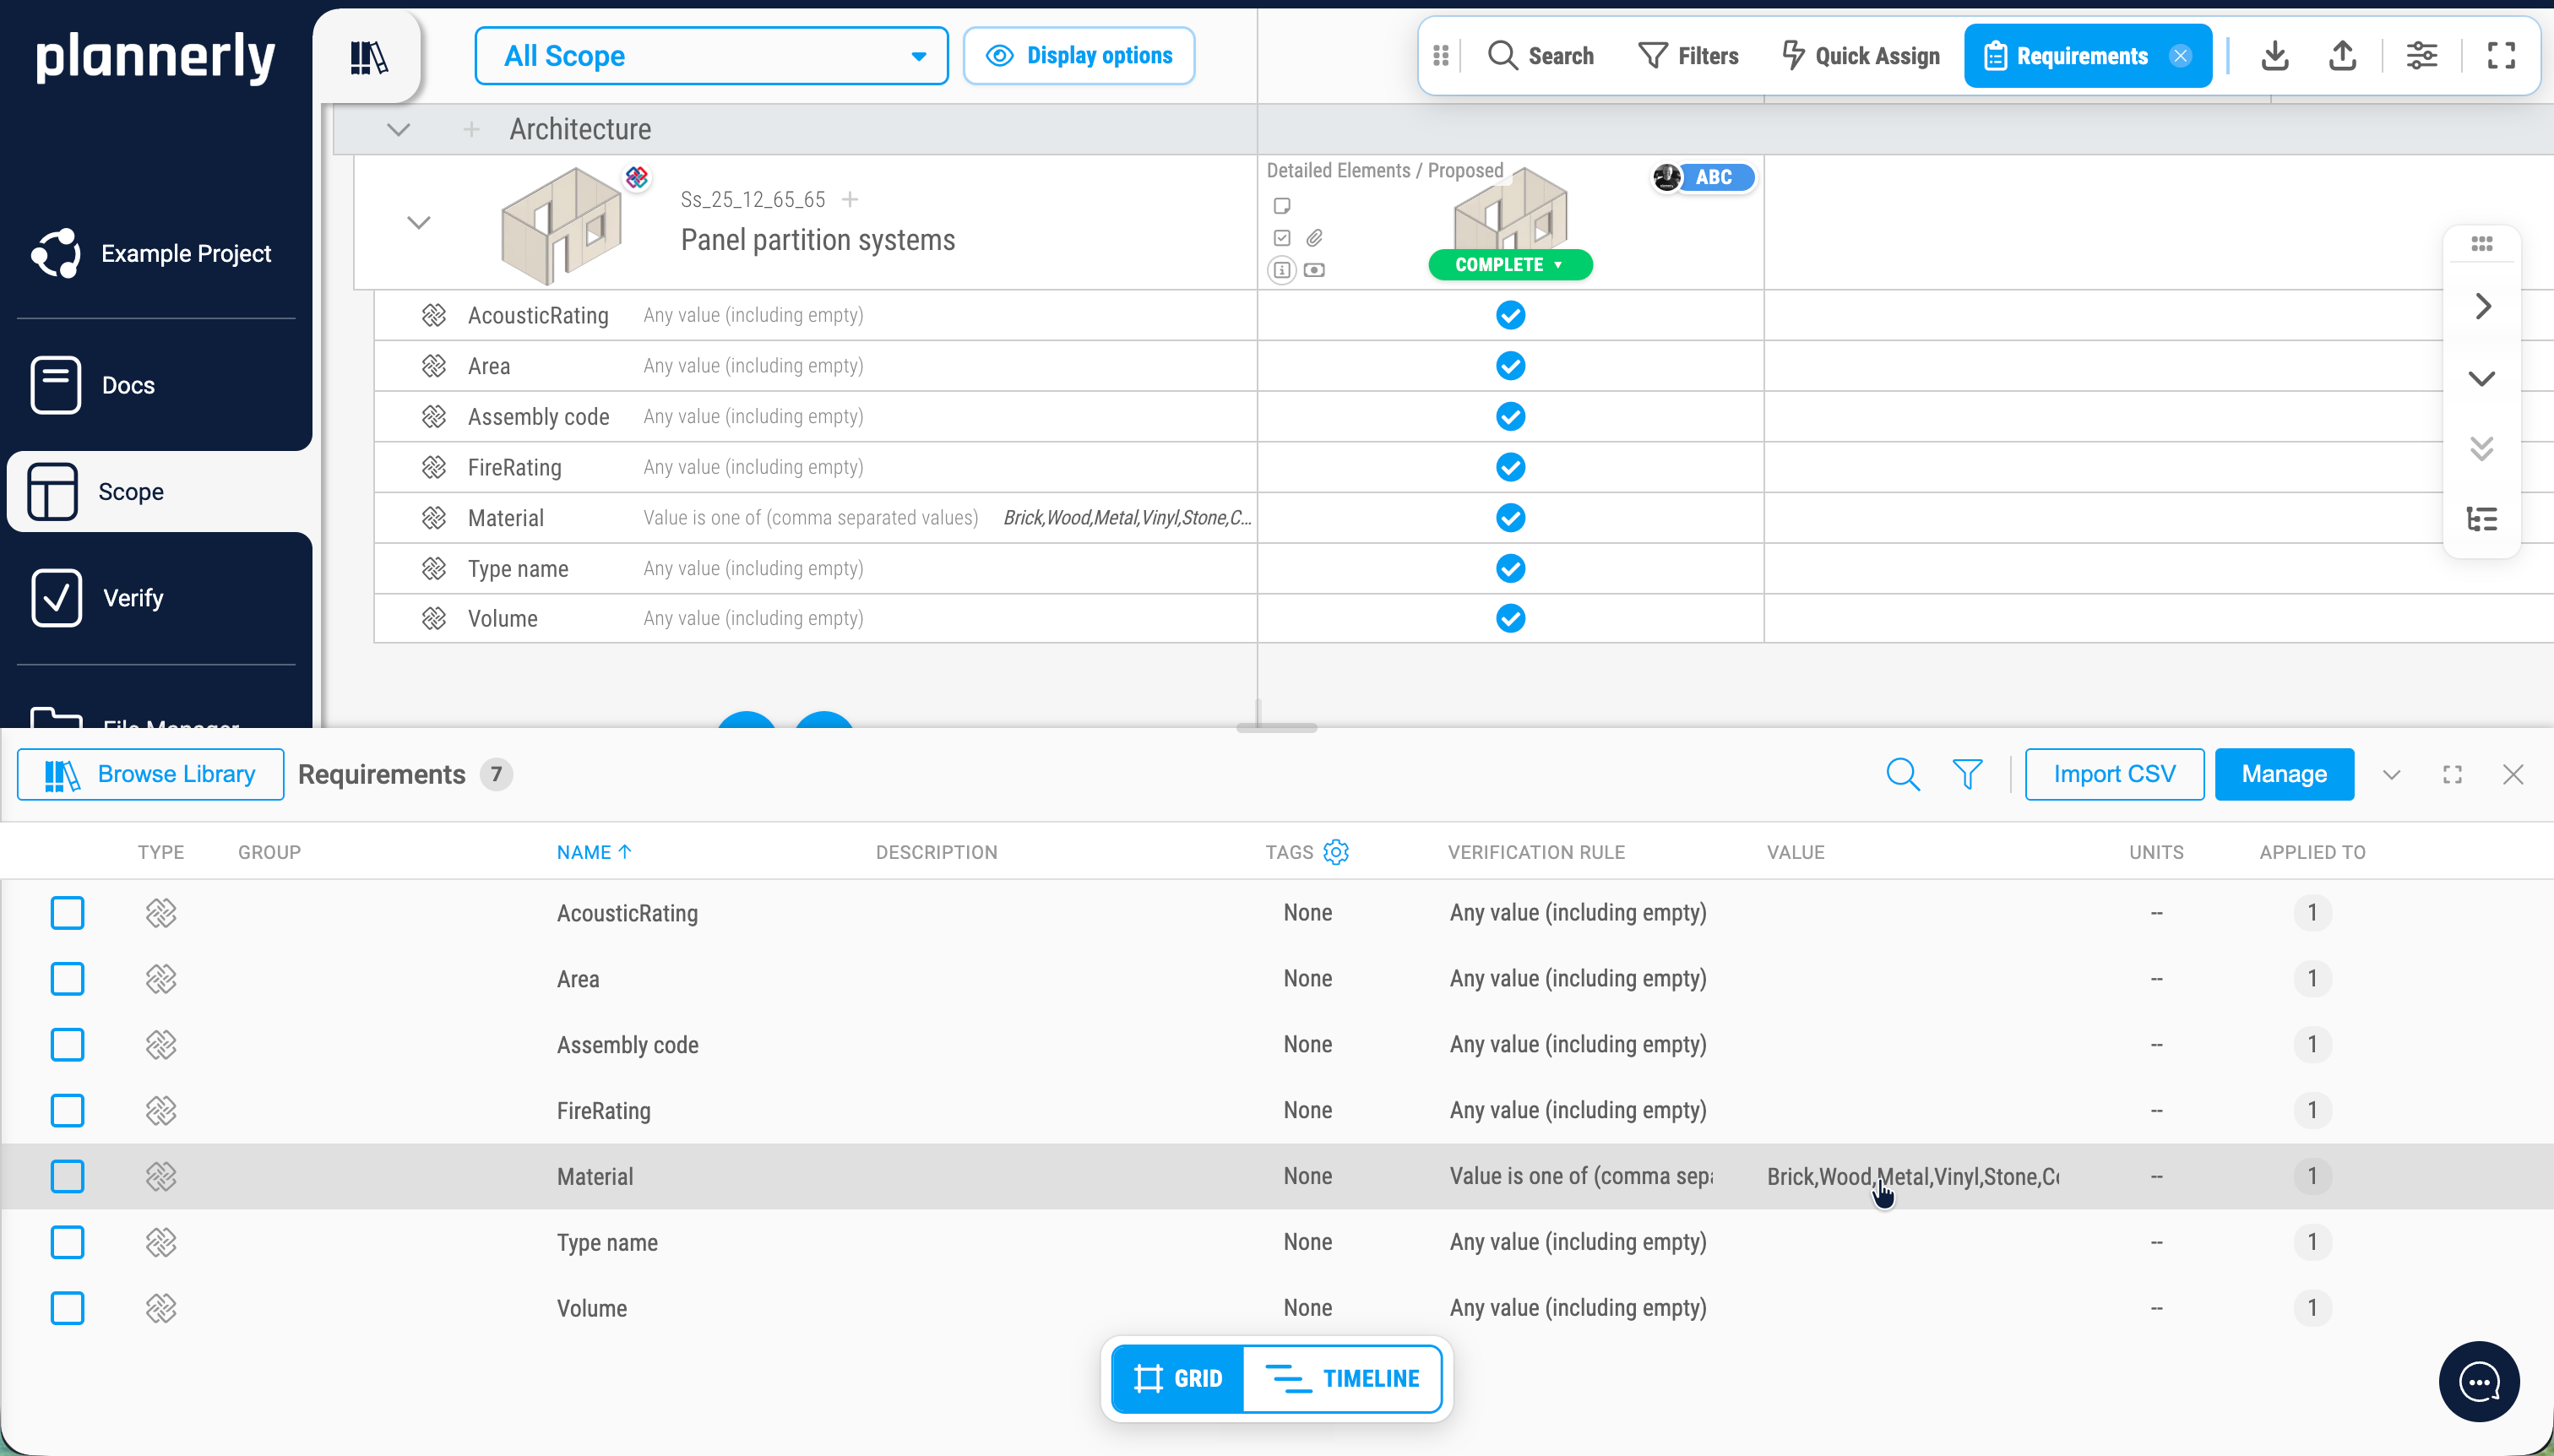
Add the element as a row in your scope, name it, and classify it using the buildingSMART Data Dictionary (bSDD). The example uses Uniclass 2025 - start typing "wall" and pick the specific wall type. Set the IFC entity type (for the wall example, IfcWall) and switch on the classification code and entity type in display options.
Open the Requirements panel and create the five properties that matter for the estimate - Acoustic Rating, Fire Rating, Wall Type Name, Volume, and one more relevant to your wall family. Write a verification rule for each one. For the acoustic rating, describe the rule in plain language ("must follow UK acoustic rating standards") and let Plannerly's AI generate a regular expression - then sanity check it. Assign the five requirements to the element and export everything as an IDS specification.
Step 3 - Set up dashboards and the contract export
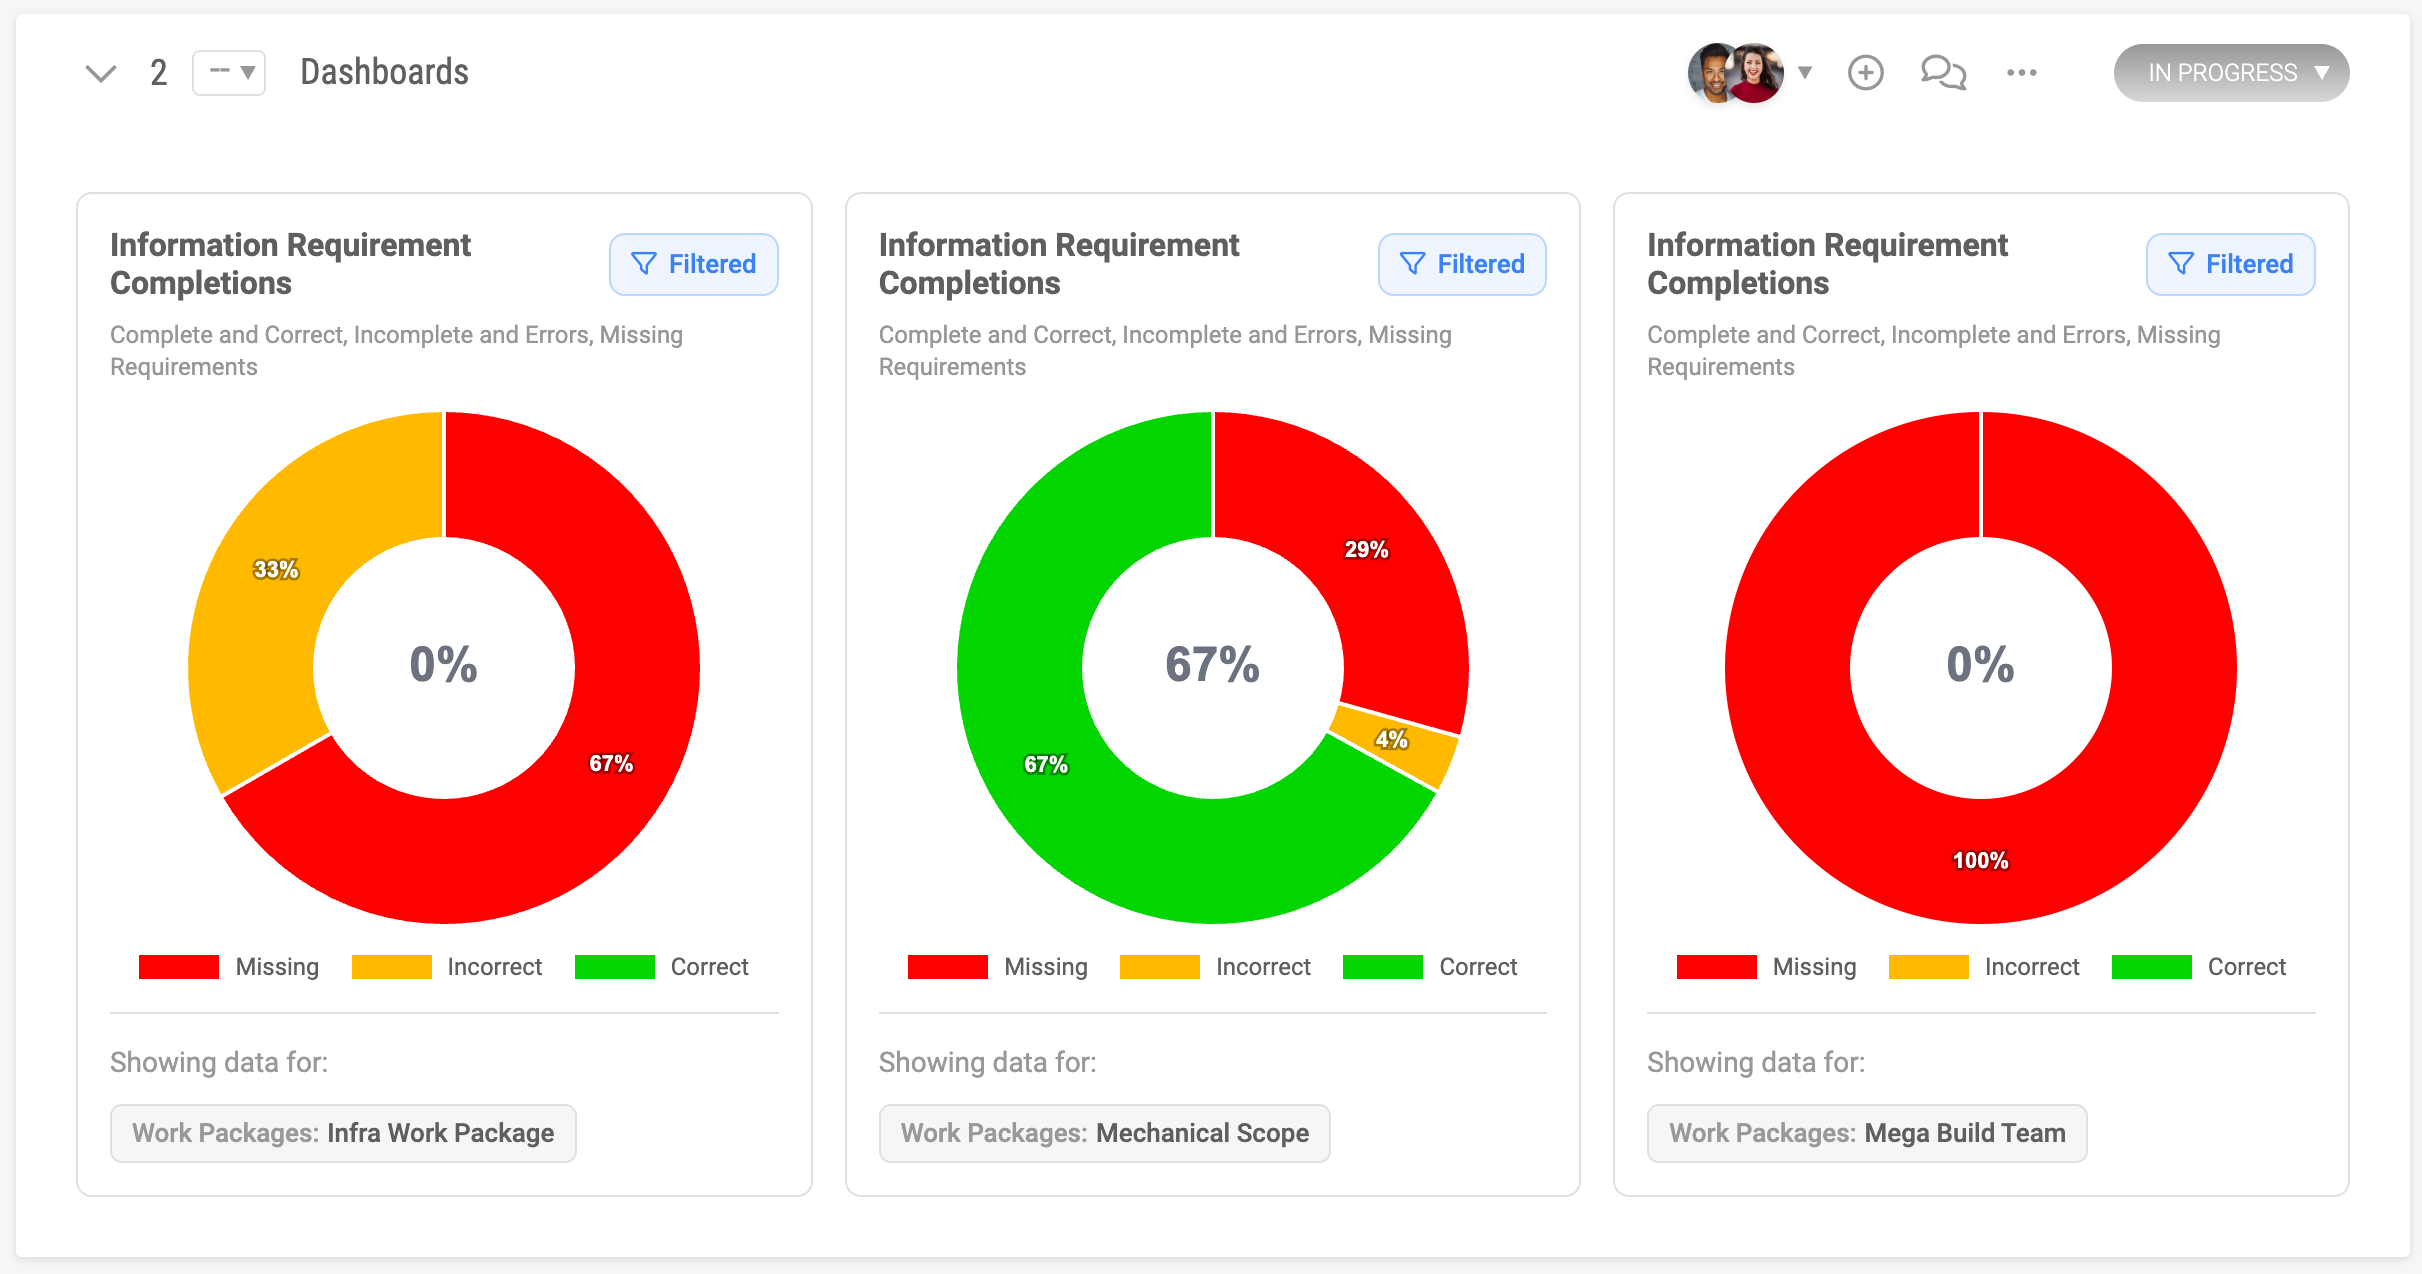
Requirements only earn their keep when progress against them is visible and the responsible team is contractually committed. In the Docs module, create a Dashboard category and add two charts - Information requirements completions as a doughnut and Task status as a bar chart. Both fill in automatically as soon as models are checked and approvals move forward.
Open the contract export and include the methods of measurement, a cover page, the grid of requirements, the rules, the details, and a generated document index. The preview shows everything paginated and indexed. Enable the e-signature workflow if you need a formal appointment. The contract is generated from the same data the team will be checked against - so there is no gap between what was agreed and what gets verified.
Step 4 - Link and verify the model
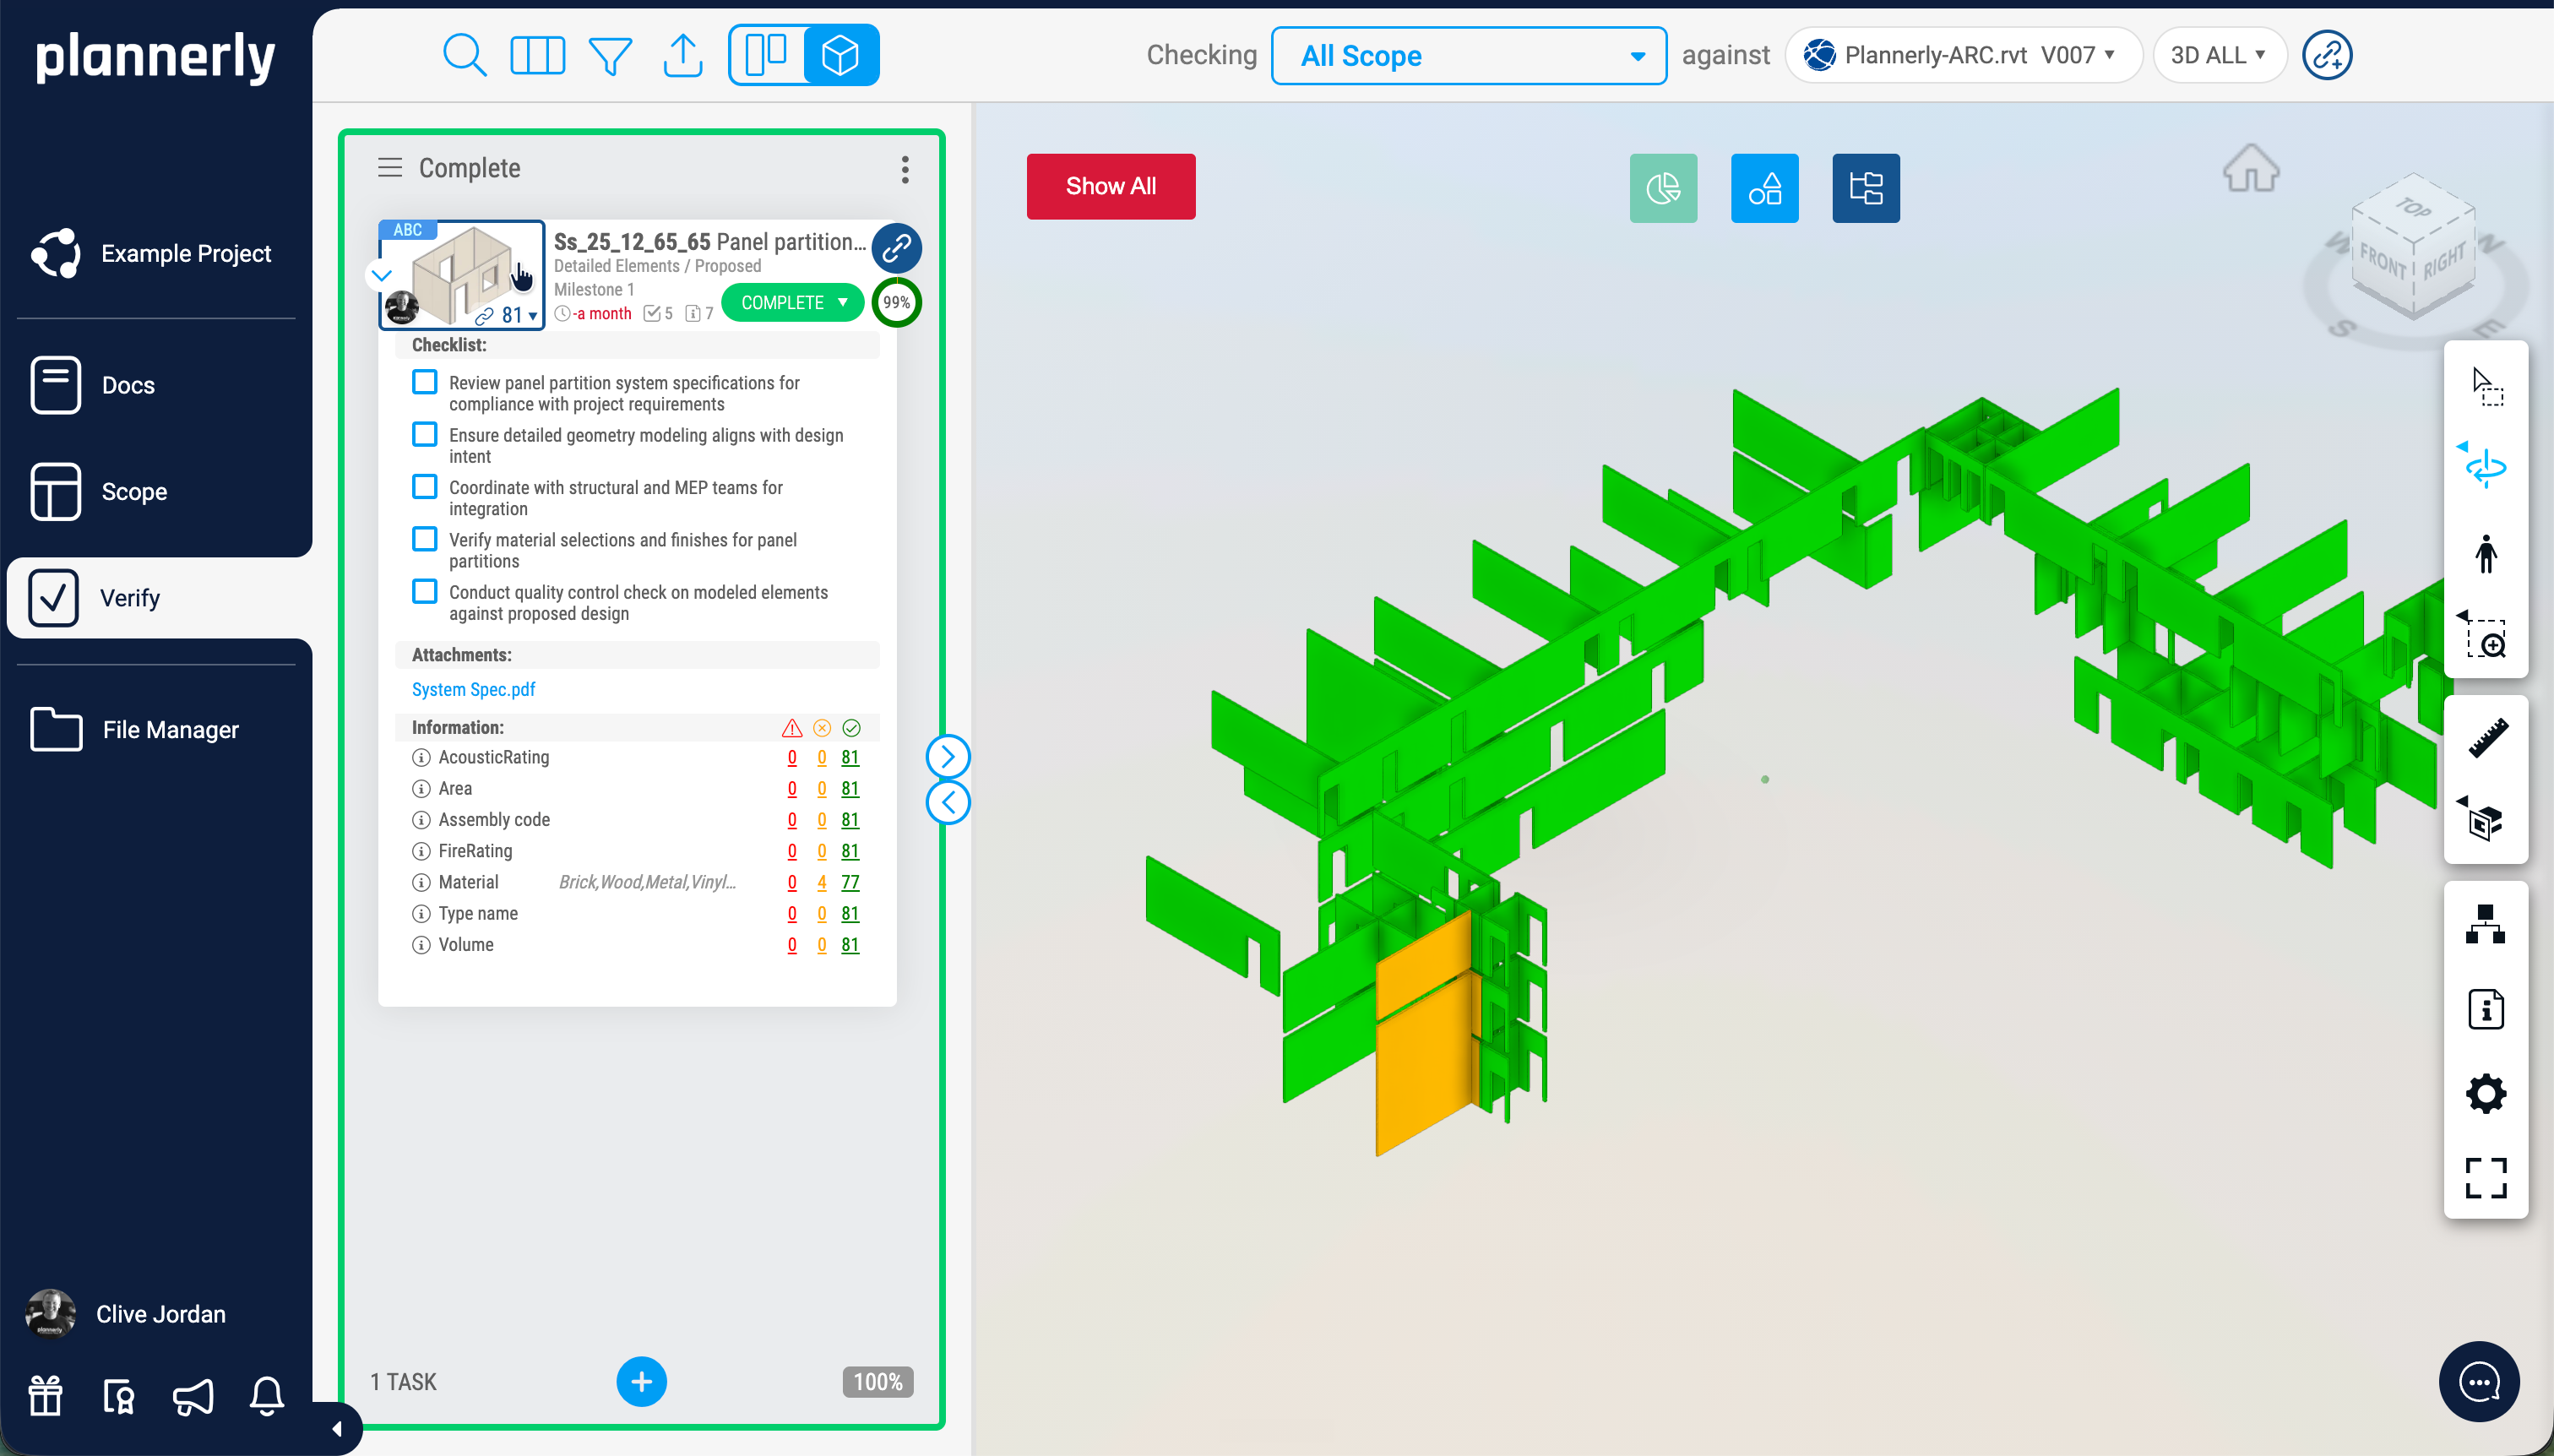
Once a team has delivered, open the Verify module and drag the task to Completed on the Kanban board. Drop in an IFC, Revit, SketchUp, or DWG file, or connect Autodesk Construction Cloud (ACC) for automatic version sync. Click Index to fetch every property in the model.
Use the link icon on the task to add a rule - "name contains interior wall" links every interior wall to the task in one go. Verify evaluates the results. A first pass typically lands at eighty per cent or so, and tells you exactly which property is missing or failing the regex. Fix the model or fix the rule (you can edit a property name in Verify if the model used "AcousticRating" with no space, for example) and re-evaluate until you hit one hundred.
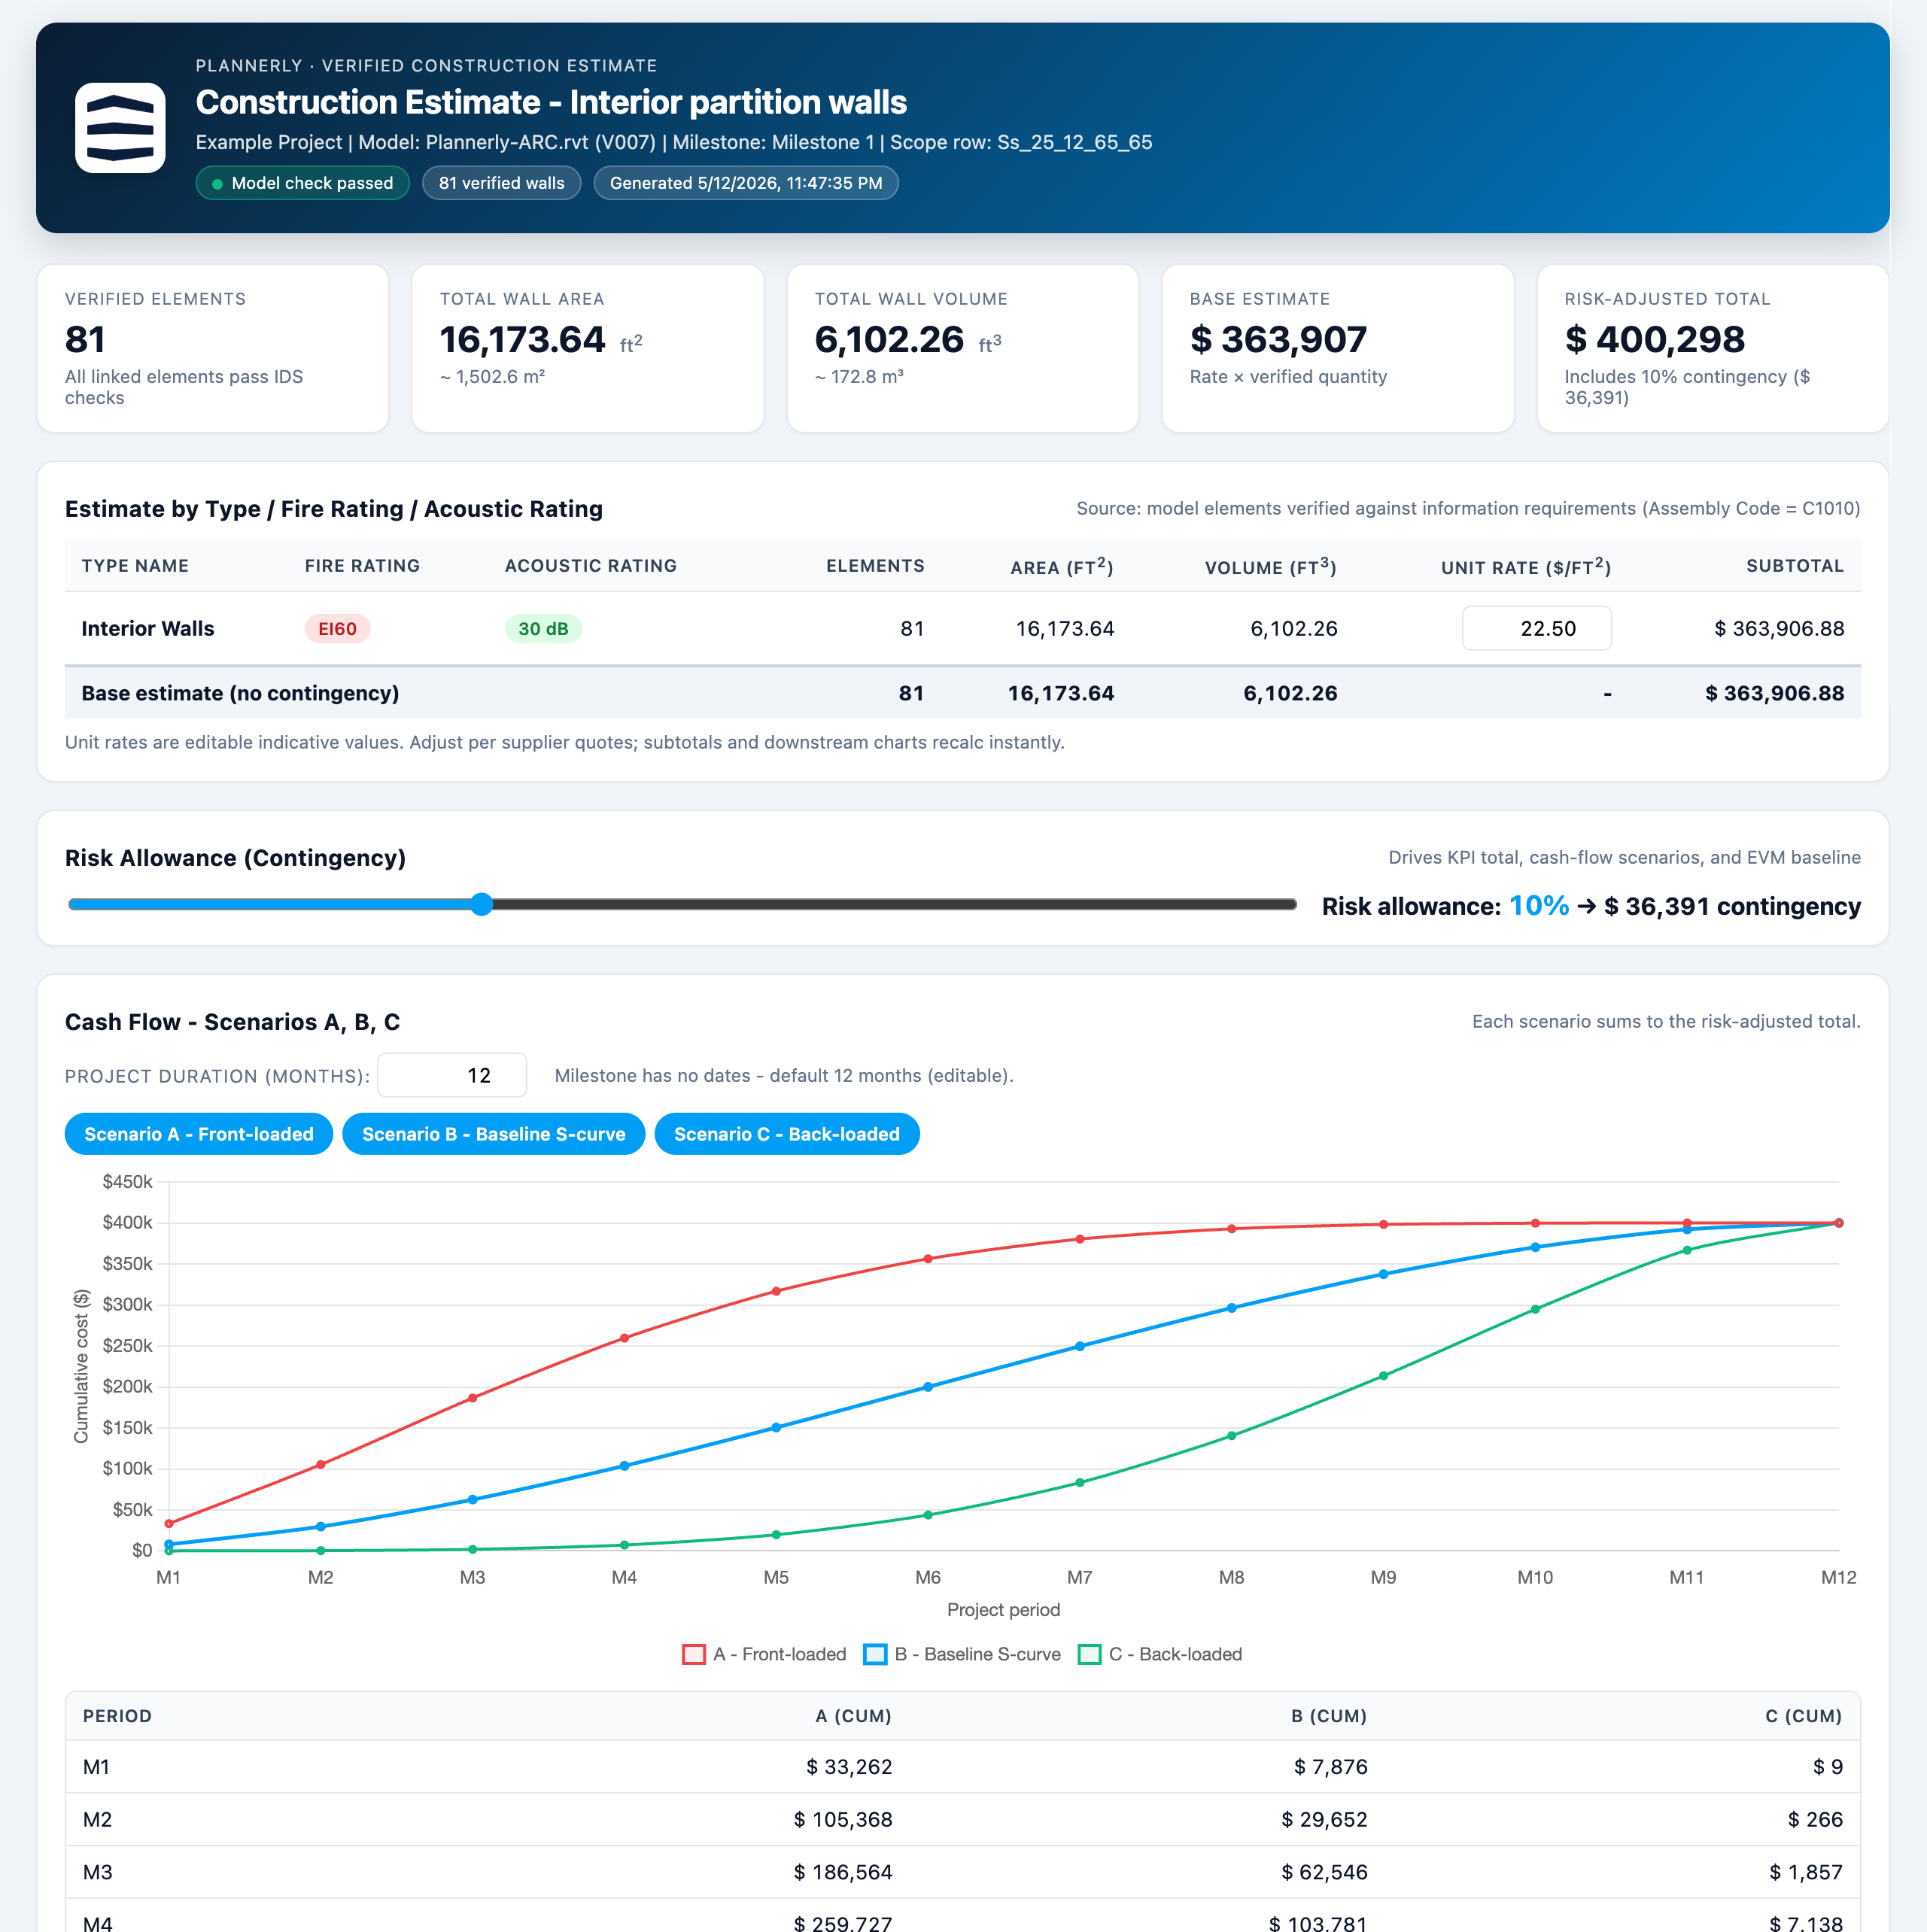
Step 5 - Generate the AI estimating dashboard via the Plannerly API
Generate an API key from your Plannerly account page - it is tied to your account, so all calls and data processed are tracked under that key. In an AI tool (Claude works well for this), write a prompt that includes the API key, the project name, the part of the estimate to focus on, the KPIs and scenarios you want, and a website to pull branding from so the report matches your company. Hit go and let it build the dashboard.
The output is interactive. Risk sliders raise or lower contingency. Duration sliders show what happens with front-loaded versus back-loaded spends. Schedule Performance Index (SPI) and Cost Performance Index (CPI) sit alongside quantities and costs. AI did not estimate anything - it read clean data from the API and presented it well. That is the line worth holding. Bundle the methods, requirements, timeline, and dashboard into a single export and assign it for review or e-signature.