How to survive as a BIM Manager · Episode 5
Open book. Everyone passes.
The complete guide to Surviving AI Model Checking: why model checks break, the open-book fix, and the three demos - Auto-EIR, Auto-Checks and Auto-LOD - done step by step in Plannerly.
TL;DR - Every model gets checked. The only question is when. Episode 5 turns model checking into an open-book exam: everyone gets the questions on day one and checks their own work as they go. Plannerly writes the requirements from the model even when there's no EIR (Auto-EIR), turns a rule you say in plain language into a check on every value (Auto-Checks), and checks true LOD in the geometry itself (Auto-LOD, a world first, now in beta). Watch the replay, then follow each step in your own project.
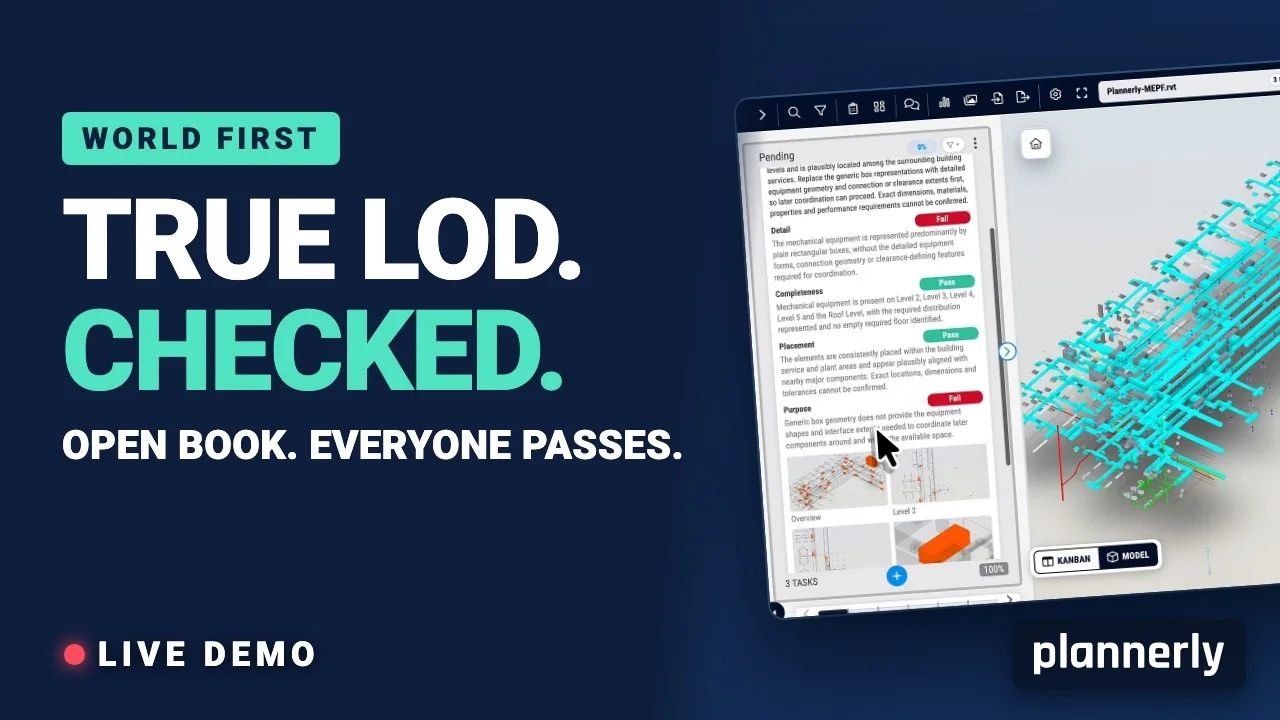
Webinar replay · 41 minutes
Surviving AI Model Checking
Clive Jordan (co-founder), Akos Hamar (COO) and Bharathi Balu (Information Management Lead) check a real architectural model and a real MEP model, live.
What it covers
- Why model checking breaks, and the open-book fix
- Auto-EIR: requirements written from the model
- Auto-Checks: rules said in plain language
- Auto-LOD: true LOD, checked in the geometry
Each chapter below starts the replay at that moment.
Webinar chapters
Jump to the part you need
- 0:00 Welcome - a world first today
- 1:26 Drop in a model. Get its report card.
- 2:01 Check all the way through, not once at the end
- 3:42 The questions are in seven documents
- 4:25 Why checking breaks 1: handed a model with no EIR
- 4:56 Why checking breaks 2: easy to write, hard to check
- 5:29 Why checking breaks 3: LOD, a thousand opinions
- 6:07 A check with no requirement is just an opinion
- 6:58 Make it an open-book exam
- 7:56 What if...?
- 9:45 Three demos: Auto-EIR, Auto-Checks, Auto-LOD
- 10:56 Demo 1: Auto-EIR - no EIR? Plannerly writes it
- 12:36 Create scope from the model
- 13:17 First check: what's there and what's missing
- 14:49 Assets and project requirements, sorted for you
- 15:28 Demo 2: Auto-Checks - if you can say it, you can check it
- 16:24 From "any value" to a real rule
- 17:12 An acoustic rule in plain language
- 18:24 A fire rating rule for a school in Barcelona
- 19:23 Check again: correct, incorrect, missing
- 21:46 Demo 3: Auto-LOD - true LOD, checked automatically
- 23:25 Scope from the MEP model
- 25:46 What LOD 300 actually expects
- 28:27 Geometry review: detail, completeness, placement, purpose
- 30:00 Cold water piping and rectangular ducts pass
- 31:23 Share it: reports, PDFs and charts
- 34:38 Coming in January: the AEC AI Agent Playbook
- 36:28 Clash Avoidance: the big idea
- 39:04 Survival kit, beta and the next episode
- 39:53 Recap and free training
Why model checking breaks
"Can you just check the model?" sounds like one job. It's at least fifteen: is the file there, is it named right, are the right elements in it, is the information on them, are the values any use, is it the right detail, is it complete, is it in the right place, does it clash, does it meet code, can you take quantities from it? And the questions are spread over seven documents - the client's EIR, the BIM Execution Plan, the federation strategy, the asset strategy, the COBie handover plan, the naming standard and that one email from March. As Clive put it, that's "roughly six more than people read".
There are plenty of really good checking tools, each brilliant at its own job. The episode looked at three problems that sit above all of them:
- No requirements. You're handed a model with no EIR (exchange information requirements). Without requirements, a check is a spot check. Good luck finding what matters.
- Easy to write, hard to check. "Every fire damper needs the warranty contact's email" takes seconds to write. Turning it into a rule a checker can run is a different job, done by different people, in a different tool. So it gets put off.
- LOD, a thousand opinions. LOD 300 typed into a spreadsheet cell or a model parameter proves that somebody typed 300. Nobody can check the geometry against it, so it all comes down to interpretation.
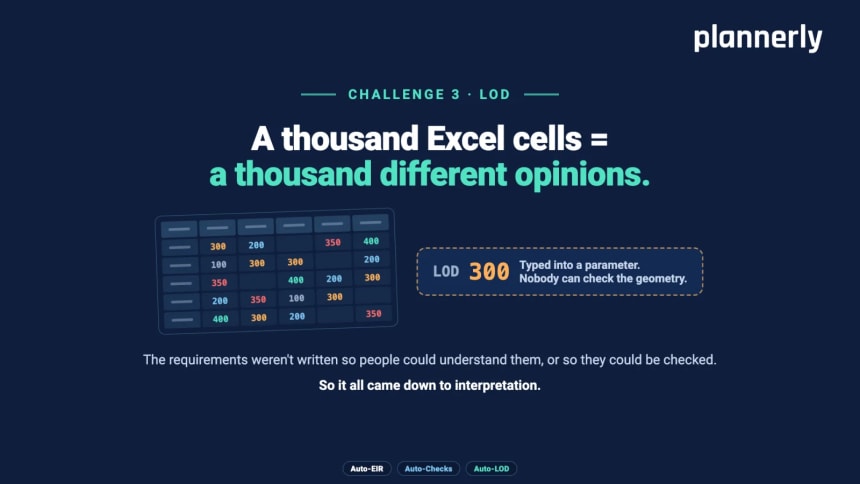
Add it up and you get the line the whole episode is built on: a check with no requirement is just an opinion.
The fix: make it an open-book exam
At school, a test finds out who failed. On a project you want the opposite: everyone on 100%. ISO 19650 already asks every team to check its own work before sharing it, yet on real projects most problems still surface at the coordination meeting, or on site.
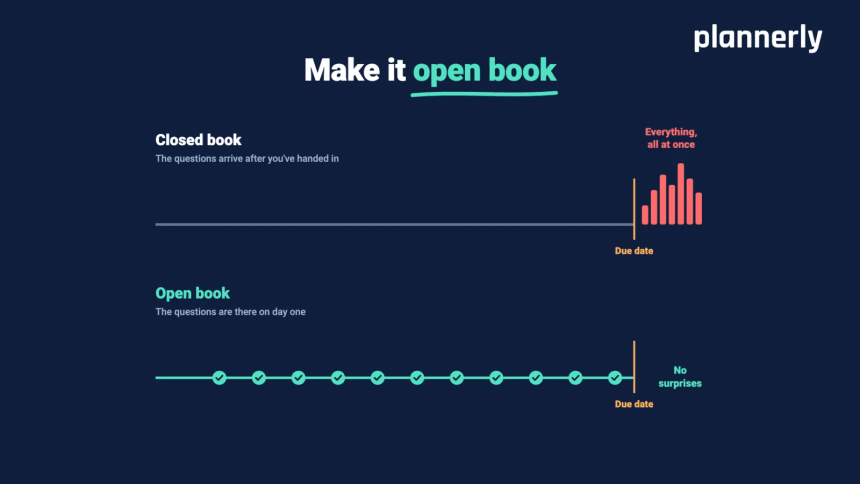
There are three ways to respond: a harder check at the end (longer lists), more meetings (enough said), or an open book. In an open-book project:
- The questions are written clearly on day one, in plain language everyone understands.
- Everyone checks their own work as they go, not once at the due date.
- Nobody gets a surprise when the model is handed in.
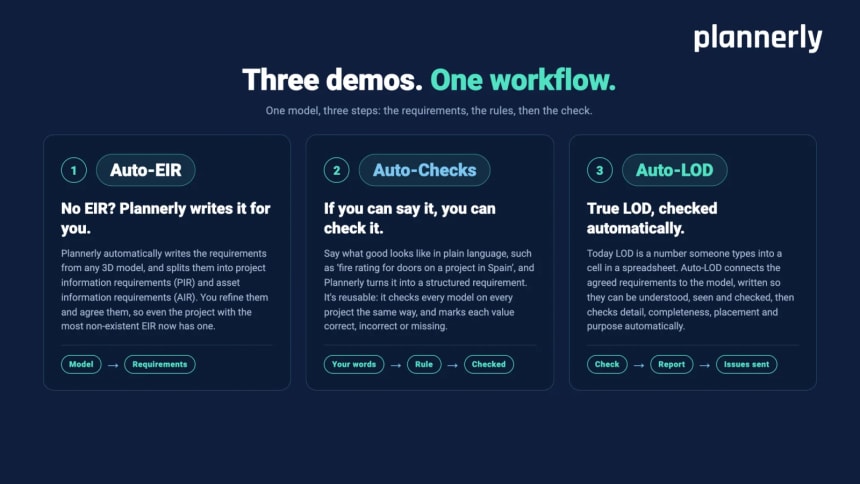
Three demos, one workflow
The three demos follow one model through three steps: the requirements, the rules, then the check. Auto-EIR, Auto-Checks and Auto-LOD are the episode's names for them. Here's where you find each one in Plannerly:
| In the webinar | What it does | Where it is in Plannerly |
|---|---|---|
| Auto-EIR | Writes the requirements from your 3D model and splits them into project (PIR) and asset (AIR) information requirements. | Import, then Create scope from a model, in Scope or Verify. |
| Auto-Checks | Turns what good looks like, said in plain language, into a rule that marks every value correct, incorrect or missing. | Requirements, then the Define Rule (Using AI) verification rule. Then Check in Verify. |
| Auto-LOD (beta) | Checks the geometry itself for detail, completeness, placement and purpose against the LOD the task asks for. | The Geometry check on a task card in Verify. |
Demo 1: Auto-EIR - no EIR? Plannerly writes it
"Story of our lives," as Akos said: a model arrives and nobody's quite sure what's in it. In the demo he took an architectural model and set up an interior fit-out review, checking acoustic rating, fire rating and material on doors, walls and ceilings.
- In Scope or Verify, open Import and choose Create scope from a model.
- Pick the model and the property that defines each task, such as Type Name. Plannerly lists every value it finds - 41 in the demo.
- Select Review tasks. Keep only the tasks you need (in the demo, the interior doors, interior walls and ceilings) and tick the properties to check under Information requirements.
- Each task carries a PIR or AIR tag: a door is suggested as an asset requirement, a wall as a project requirement. Click a tag to change it.
- Name the Work Package and select Create scope. The tasks arrive linked to their model elements, with their requirements and reference images.
- In Verify, select Check. Each task shows what's there and what's missing.
In the demo, all 29 ceilings had a fire rating and a material, but the acoustic rating showed red: the property simply wasn't on them. The 81 interior walls and the doors scored 100%.
It's a starting point you refine and agree with your client and team, not a replacement for their requirements. Step by step: How to create a scope from a BIM model in Plannerly. For the asset side, see Create an AIR for asset information requirements.
Demo 2: Auto-Checks - if you can say it, you can check it
There's a big difference between knowing what to check and knowing how to check it. Akos opened Requirements and found every rule set to accept any value, even an empty one - "not the strictest rule ever". So he described the rules in his own words instead of code:
- Acoustic: a numeric rule for internal walls separating two classrooms in a school in Barcelona. The AI named the standard it used and set the requirement at 50 decibels of airborne sound insulation.
- Fire rating: classroom partitions in the same school, uppercase only, no extra text. The AI asked which fire resistance he needed, and he chose at least 60 minutes.
"Every time I talk with this, it understands me better than my family does," Clive said. Then the check ran again, and green turned amber wherever a property was there but its value wasn't right: the doors carried no acoustic or fire rating values, and the walls had 30 decibels where 50 were needed. The good news: the walls' fire rating met the 60-minute requirement.
- Open Requirements and select Manage.
- On the requirement, select the robot button beside its Verification Rule. The Define Rule (Using AI) window opens.
- Describe what a good value looks like, then select Generate. Answer any questions it asks and select Continue.
- Read the rule, the standard it's Based on and the explanation, then save it.
- In Verify, select Check to run every task against the new rule.
Results read correct (green, the value meets the rule), incorrect (amber, the property is there but empty or wrong) and missing (red, the property isn't there at all). AI writes the rule once; after that, the check is the rule, so every version of every model gets the same answer for the same reason. A question you ask a chatbot might come back different each time. This doesn't.
Step by step: Write a model check rule in plain language with AI. To set up requirements from scratch, see Write checkable information requirements for a BIM model, and to run and read the check, How to check a BIM model against information requirements.
Demo 3: Auto-LOD - true LOD, checked automatically
This is the world first. Today, LOD is usually a number typed into a cell. Auto-LOD checks the geometry itself, so nobody needs to tag elements with an LOD parameter and nobody needs three screens and a long meeting to decide what "LOD 300" means.
LOD isn't one number. As Akos put it, "It's not just a plain number" - it's a combination of geometry and reliability, and each level is described in plain language by your project's standard. You can even define your own scale. In the demo he created a scope from the MEP model, grouped by name, with mechanical equipment, cold water piping and rectangular ducts as tasks, then checked system classification, warranty date and length. He also added a description to the mechanical equipment task and asked for an O&M manual as a PDF, so one task holds its geometry, information and documentation requirements together.
Then the Geometry check. AI looks at images of the elements linked to the task and judges four things against what the task asks for:
- Detail: does the geometry reach the level of detail the task requires?
- Completeness: are the elements there throughout, on every level they should be?
- Placement: are they the right kind of element, plausibly placed and joined?
- Purpose: would they serve the milestone's purpose, such as coordination?
Each heading gets Pass, Partial, Fail or Can't judge with a short reason, and the task gets a score against a pass mark - 80% unless you set your own. In the demo, the mechanical equipment scored 13%: generic boxes without the main parts and connections LOD 300 expects, on only one of three occupied levels. The cold water piping passed on detail and reached two of three levels, and the rectangular ducts scored 100%, on every level.
Step by step: Check a BIM model's geometry against its LOD (beta). To write what each level means for your company, see Create your company's own LOD scale in Plannerly and Choose your project's LOD or LOIN standard. More on the scales themselves: Level of Development (LOD) 100 to 500.
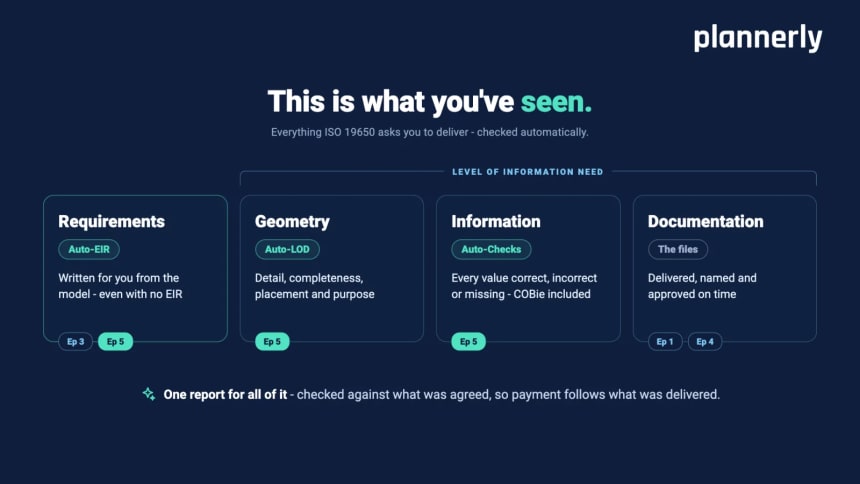
Share the results: reports, PDFs and charts
Checking is only useful if the people who can fix things see the results. Because everyone works in the same place, the modellers and designers can find the issues themselves before anyone meets. When you need to send something:
- A PDF report. Export a Work Package as a Verify report with your cover page: the information results for every task and, for beta users, each task's Geometry check with its images and reasons. Share it, or have it signed. See Export a BIM model check report to PDF.
- Charts. Select Charts in Verify to see where the problems are and filter down to them, including files requested and delivered. See How to share failed model checks with your team.
- Reports that send themselves. Put charts in a dashboard document and email it every week. See Creating dashboards for BIM model checking and How to automate PDF exports.
When a new model version arrives, check it against the same requirements: How to re-check a new model version in Plannerly.
What's next: the AEC AI Agent Playbook and Clash Avoidance
A new series, The AEC AI Agent Playbook, starts on Thursday 14 January 2027: six practical episodes on putting AI agents to work on real projects, with a free playbook for each.
Its first big idea is Clash Avoidance. Some people think coordination meetings are really valuable, some think they're a waste of time, and both are right. When everyone models alone and hands in on the due date, the meeting finds thousands of issues at once - Clive's verdict: clash detection "is so 2006". Clash avoidance agrees who has priority before anyone models: the hardest, most expensive thing to move goes in first, from structure and gravity systems down to branch lines. The same clash can be fixed by moving the pipes or the cable tray, with two very different bills. Agree it up front and the BIM manager stops refereeing and starts planning. In the episode's case study, the manual version of this workflow alone gave 53% fewer issues, before any automation or AI.
Episode 5
AI Model Checking Survival Kit
Everything from the episode: the slides, and step-by-step guides to doing each demo in your own project.
- 39 slides
- 3 step-by-step guides
- Free
Check your own model in Plannerly
Upload a model, create a scope from it and check it the way the episode does. Start free, and Plannerly offers a 14-day trial with one model included. No card needed.
The kit is also on the Episode 5 page, with every earlier episode of the series.
Your turn
Try it on your own model.
Start with the model you already have. Create a scope from it, tighten one rule in plain language, and run the check. Then join the beta and see what the Geometry check makes of your LOD 300.
Live Episode 6
Dec 3 Thu
How to survive as a BIM Manager
Surviving ISO 19650 File Naming
- 10:00 New York
- 15:00 London
- 19:00 Dubai
Never name a file by hand again. Free on Zoom, with the replay and a survival kit after.
Help for each step
Step by step, from the Help Center
Learn it properly
Certified Plannerly Professional
Follow the project workflow, from the model to the check, in short videos you can skip through, and get a free certificate at the end.
AI model checking questions
Questions people ask about AI model checking
What is AI model checking in Plannerly?
It's checking a BIM model against agreed requirements, with AI doing the slow parts: Plannerly writes requirements from the model, AI turns a rule you describe in plain language into a check on every value, and the Geometry check (in beta) uses AI to judge the geometry against the task's LOD. Results sit on each task in Verify, beside the model.
Can I check a model if the client never sent an EIR?
Yes. Use Create scope from a model to turn the model's types into tasks and its properties into information requirements, split into project (PIR) and asset (AIR) requirements. Refine them and agree them with your client, then check the model against them.
Do I need to know regular expressions to write model check rules?
No. Describe what a good value looks like, such as "fire rating for doors on a project in Spain", and AI writes the regular expression for you, with a plain explanation of what it accepts. You can still type your own if you prefer.
How does Plannerly check LOD automatically?
The Geometry check looks at images of the model elements linked to a task and judges Detail, Completeness, Placement and Purpose against the task's required level of detail, its description and its milestone. It needs no LOD parameter in the model. It's in beta: type "add me" in Support to join.
Does the Geometry check replace clash detection?
No. It judges whether the geometry is detailed enough, complete, sensibly placed and fit for its purpose. It doesn't measure exact sizes or tolerances, so clash, clearance and coordination checks are a different job.
What do correct, incorrect and missing mean?
Correct (green) means the property is there and meets the rule. Incorrect (amber) means it's there but empty or wrong. Missing (red) means the property isn't on the element at all.
Which models can I check?
IFC and Revit models, and other formats the Autodesk viewer opens, uploaded to Verify or connected from Autodesk Forma. See How to upload a BIM model to Plannerly Verify and what an IFC model is.
Can I use these requirements outside Plannerly?
Yes. Export them as a buildingSMART IDS file so modellers can check their own work in their authoring tool. See How to export information requirements as an IDS file.
Can I try it for free?
Yes. Create a free account. When you add a model, Plannerly offers a 14-day trial with one model included, no card needed. The Geometry check is open to everyone in the beta testing community.